How to Create a VPS (Droplet) on DigitalOcean
Your first step to using Snac is building a new server (VPS). We selected DigitalOcean for our first example. If you need help, reach out to us and we'll help you as best as we can (we'll even set it up for you 😊).
To access the DigitalOcean Control Panel and create a Droplet, you need a DigitalOcean account. You can create one from the DigitalOcean new account registration page if you don’t already have one.
After you log in to the control panel, click the green Create button in the top right to open the create menu.
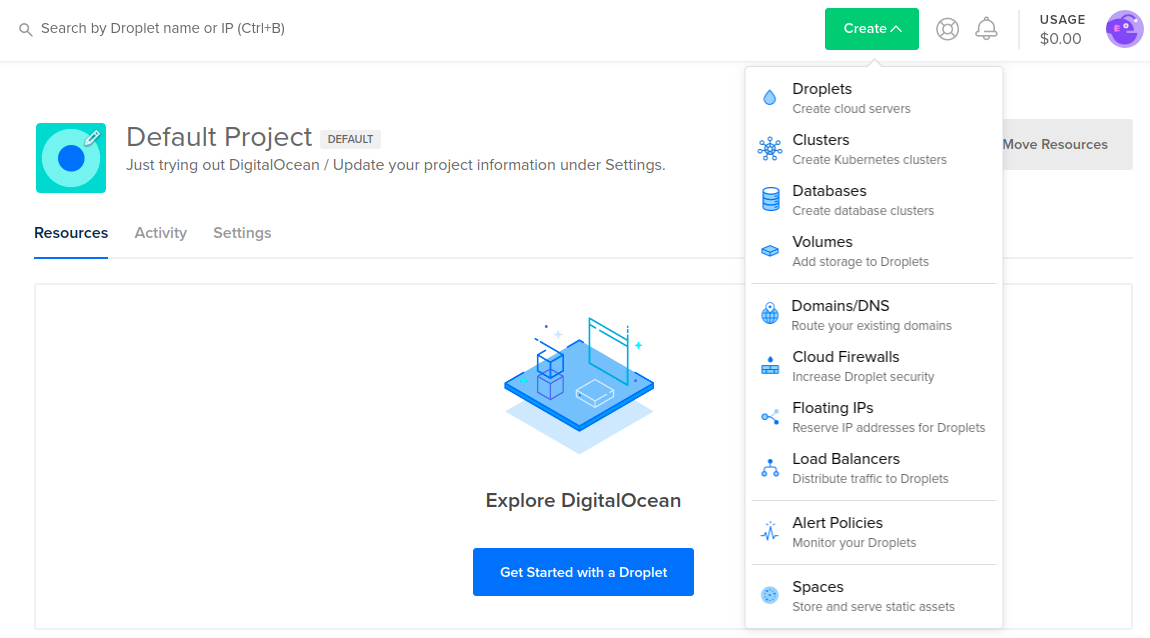
In the create menu, click Droplets to open the Droplet create page. If you don’t have any Droplets, the Resources tab displays a large, blue Get Started with a Droplet button, which takes you to the same Droplet create page.
The Droplet create page is where you choose your Droplet’s configuration, like its operating system, how much memory it has, and which features (like backups or monitoring) to enable. The most popular defaults are pre-selected, so you can scroll to the bottom of the page and create a Droplet immediately, or you can customize any of the options in each section.
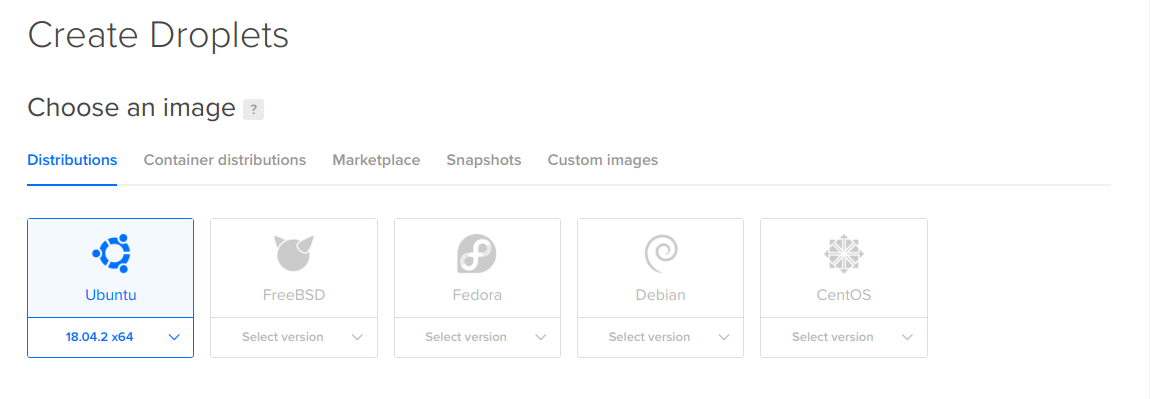
Choose your image
In the 'Distributions' section select Ubuntu 18.04.* (LTS) x64:
Choose a plan
In the Choose a plan section, you choose the amount of RAM, storage space, and CPU cores your Droplet will have.
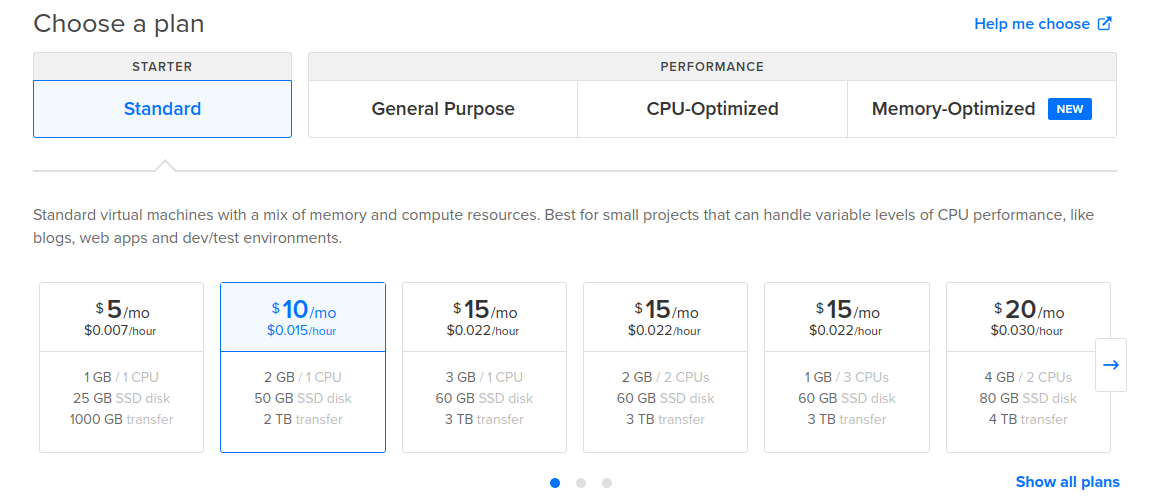
There are four types of plans:
- Standard Droplets, a flexible option best for most use cases, like website hosting, staging environments and low intensity compute needs.
- General Purpose Performance Droplets, a robust option suitable for a wide variety of mainstream, production applications that require a higher ratio of memory to CPU.
- CPU-Optimized Performance Droplets, best for CPU intensive tasks and projects that require predictable performance or rely on CPU more than RAM or I/O, like batch processing large data sets, large builds, and video encoding.
- Memory-Optimized Performance Droplets, best for resource-intensive business applications, like high-performance SQL or NoSQL databases, large in-memory caches and indexes, real-time big data processing, and applications with large JVM requirements.
Add block storage
If you are familiar with block Storage add now. Note: you can add block storage at anytime from your DigitalOcean control panel (see Volumes).
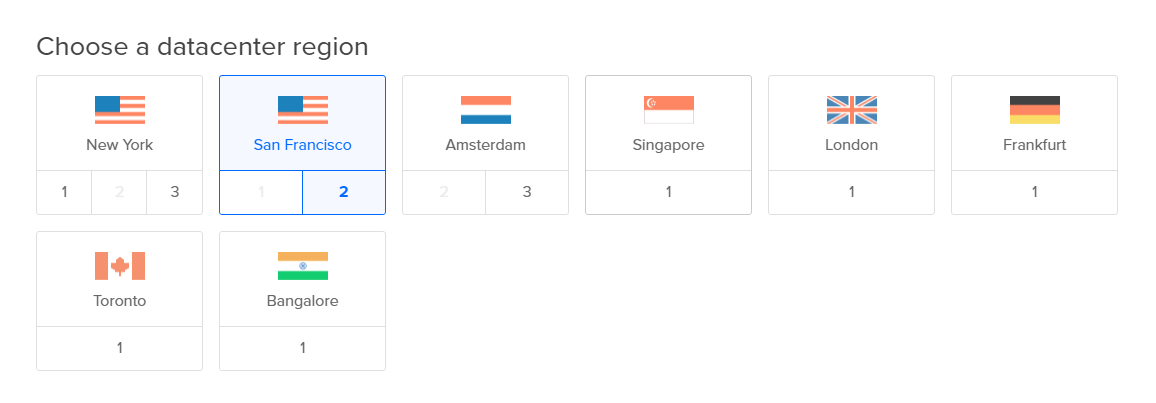
Choose a datacenter region
In the Choose a datacenter region section, select the region where you want to create your Droplet.
A good default is selected for you, but for the best performance and minimal latency, choose the datacenter nearest to you and your users. You can also make a decision based on which products and features are available in which regions.
Authentication
In the Authentication section, you choose the method you want to use to log in to your Droplet. There are two options:
- SSH keys, which provides more security than a root password.
- Password, which you must create and store securely.

Add backups
In the Add backups section, you can enable automatic weekly backups of the Droplet by ticking the Enable backups button. This adds 20% to the Droplet’s monthly price. Note: you can add backups at anytime from your DigitalOcean control panel.
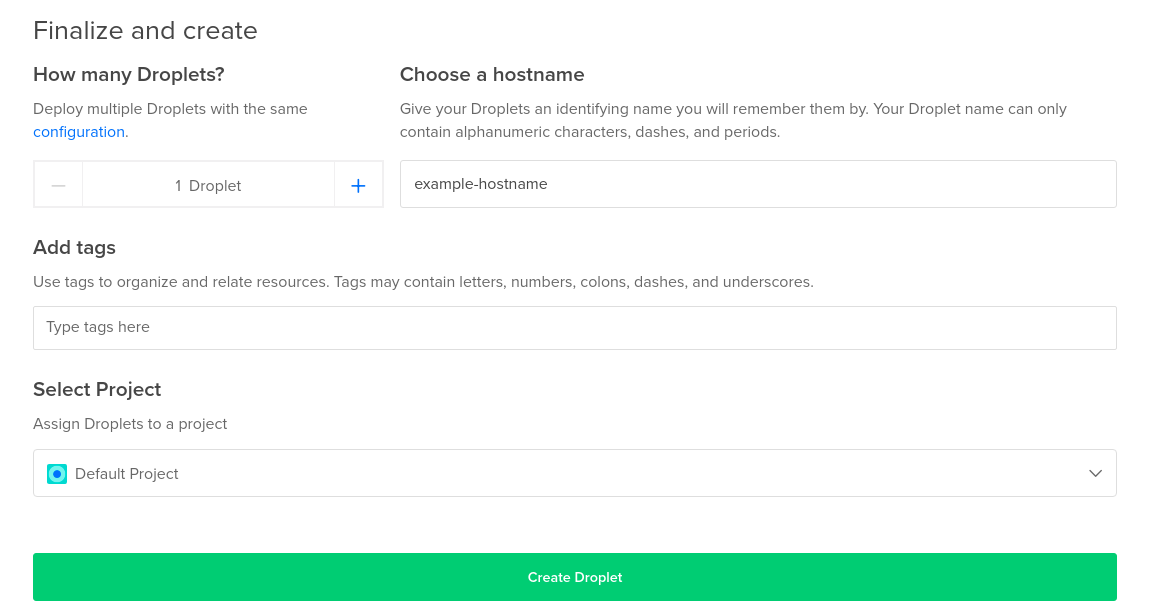
Finalize and create
In the Finalize and create section, you specify the quantity, name, tags, and project for the Droplet you’re creating.
Once you have selected your options, click Create. A progress bar displays how close your Droplet is to being ready.

Once the Droplet’s is fully set up, the control panel displays its IP address.
